Garage Door Blog In Your Area

Tag: Garage Door Repair Lantana TX

How Do I Fix My Garage Door Spring – Lantana Gates & Garage Doors

Before we delve into the troubleshooting process, it’s vital to comprehend the role of Garage Door Repair Lantana TX.

These springs bear the weight of the garage door, making it possible to lift and lower with ease. They counterbalance the door’s weight, reducing the strain on the opener motor and ensuring smooth operation.

1. Broken Springs

One of the most common issues is a broken spring. This can happen due to wear and tear over time, sudden temperature changes, or poor quality springs.

2. Rust and Corrosion

Rust and corrosion are common enemies of garage door springs, especially in areas with high humidity. They weaken the springs, leading to reduced functionality and eventual failure.

3. Torsion Spring Issues

Torsion springs, found above the closed garage door, are susceptible to issues like twisting or coil separation. These problems can impede the door’s movement.

Tools You’ll Need

Before you embark on fixing your garage door spring, gather the necessary tools: winding bars, a socket wrench set, safety goggles, a ladder, and a clamp.

Step-by-Step Guide to Fixing Garage Door Springs

1. Identify the Type of Spring

Garage doors typically have either extension or torsion springs. Identify which type you have, as the repair process varies.

2. Release Tension

For torsion springs, use winding bars to release tension. Insert the bars into the winding cone and slowly unwind the spring.

3. Remove the Old Spring

Once the tension is released, use a socket wrench to loosen the set screws. Remove the old spring carefully.

4. Install the New Spring

Secure the new spring in place, ensuring it is correctly positioned. Tighten the set screws to secure it.

5. Torsion Spring Coil Issues

If your torsion spring has coil issues, use winding bars to manually adjust and align the coils.

6. Extension Spring Replacement

For extension springs, carefully disconnect them from the pulley system and replace with new ones.

7. Inspect for Rust and Corrosion

Check for rust and corrosion on the springs. If present, use a wire brush to remove the rust and apply a rust-resistant spray.

8. Safety First

Always prioritize safety. Wear safety goggles, and use a ladder and clamp to secure the door in the open position during repairs.

9. Test the Door

After completing the repairs, test the door’s functionality by opening and closing it a few times to ensure smooth operation.

When to Seek Professional Help

While some garage door spring repairs are DIY-friendly, complex issues may require professional assistance. If you’re unsure or uncomfortable with the repair process, it’s safer to consult a garage door technician.

Tips for Preventing Future Spring Issues

  • Schedule regular inspections to catch issues early.
  • Lubricate the springs annually to reduce friction and wear.
  • Invest in high-quality springs for longevity.

Conclusion:

Fixing your Garage Door Repair Lantana TX can be a challenging but rewarding task. By understanding the common issues and following our step-by-step guide, you can regain control of your garage door’s functionality. Remember, safety is paramount, and if in doubt, seek professional help.

Lantana Gates & Garage Doors

1180 Central Way, Lantana, TX 76226, United States

1-940-400-3038

How To Get A New Liftmaster Garage Door Opener – Lantana Gates & Garage Doors

Finding and purchasing a new LiftMaster Garage Door Repair Lantana TX can be a straightforward process when you follow these steps.

First, it’s important to determine the type of garage door opener that suits your needs. LiftMaster offers a variety of models with different features, so consider factors such as door size, weight, and desired functionalities.

Start by measuring your garage door to ensure compatibility with the opener. Note the height and width of the door, as well as any other specific requirements outlined in LiftMaster’s product specifications. This information will help you choose an opener that can efficiently and safely operate your garage door.

Next, identify the type of drive system you prefer. LiftMaster offers chain-drive, belt-drive, and screw-drive openers. Chain drives are durable and cost-effective but may be noisier. Belt drives are known for their quiet operation but tend to be slightly more expensive. Screw drives strike a balance between the two, offering reliability with moderate noise levels.

Consider the horsepower required for your garage door. Single-car garage doors typically require less horsepower than double-car doors or those made of heavier materials. LiftMaster categorizes its openers based on horsepower, so select one that aligns with your door’s specifications.

Now, decide on additional features that you may want in your garage door opener. LiftMaster offers options such as built-in Wi-Fi connectivity, smartphone control, battery backup systems, and security features. Review the product descriptions and user reviews to ensure the opener has the features you desire.

Once you’ve narrowed down your options, compare prices from various retailers. Check LiftMaster’s official website, authorized dealers, and reputable online retailers. Keep an eye out for promotions, discounts, or bundled packages that may offer better value for your money.

Read customer reviews to gauge the satisfaction and reliability of the models you’re considering. Look for feedback on installation ease, noise levels, and overall performance. This information can provide valuable insights and help you make an informed decision.

Before making a purchase, confirm the warranty coverage for the chosen garage door opener. LiftMaster typically offers warranties ranging from one to five years, depending on the model. Ensure that the warranty provides sufficient coverage for potential issues and defects.

Once you’ve made your decision, proceed with the purchase. If buying online, double-check your order before completing the transaction. If purchasing from a physical store, inquire about any installation services they may offer or consult the services of a professional installer if needed.

After acquiring your new LiftMaster garage door opener, follow the provided installation instructions carefully. If you’re unsure about any step, consider hiring a professional installer to ensure proper setup and functionality.

In conclusion, choosing a new LiftMaster Garage Door Repair Lantana TX involves assessing your garage door’s specifications, selecting the right drive system and horsepower, considering additional features, comparing prices, reading customer reviews, and securing a reliable warranty. Following these steps will help you make an informed decision and enjoy the convenience and security of your new garage door opener.

Lantana Gates & Garage Doors

1180 Central Way, Lantana, TX 76226, United States

1-940-400-3038

How To Install Side Mount Garage Door Opener – Coppell Gates & Garage Doors

Installing a side mount Garage Door Repair Lantana TX can be a bit challenging, but with the right tools, materials, and step-by-step instructions, you can do it yourself.

In this guide, we’ll walk you through the process in detail, providing a comprehensive overview of how to install a side mount garage door opener.

Tools and Materials You’ll Need:

  1. Side mount garage door opener kit
  2. Ladder
  3. Power drill with bits
  4. Screwdriver set
  5. Adjustable wrench
  6. Level
  7. Tape measure
  8. Pencil
  9. Safety goggles
  10. Socket set
  11. Wire stripper and crimping tool
  12. Electrical tape
  13. Extension cord
  14. Stud finder
  15. Ceiling brackets (if not included in the kit)
  16. 2×4 lumber (if additional framing is needed)

: Read the Instructions

Before you start, carefully read the installation manual provided with your side mount garage door opener kit. Different models may have specific requirements and instructions, so it’s crucial to understand them fully before beginning the installation.

: Prepare Your Garage Door Opener

Unbox your side mount garage door opener and lay out all the components. Organize them according to the instructions to ensure you have everything you need.

: Locate the Proper Position

Use a stud finder to locate the ceiling joists in your garage. The side mount garage door opener should be installed parallel to the garage door track and securely attached to the ceiling joists for stability.

: Install Ceiling Brackets (if necessary)

If your kit doesn’t include ceiling brackets, you may need to attach 2×4 lumber to the ceiling to serve as a mounting surface. Make sure this lumber is securely anchored to the ceiling joists.

: Assemble the Rail

Follow the instructions to assemble the rail system that guides the garage door. This typically involves connecting multiple rail sections, so ensure they align properly and are securely fastened.

: Attach the Rail to the Ceiling

Using your power drill and appropriate fasteners, attach the rail to the ceiling brackets or the 2×4 lumber you’ve installed. Ensure it’s level and securely in place.

: Mount the Motor Unit

Securely mount the motor unit to the ceiling or wall, as specified in the installation manual. Use a level to ensure it’s properly aligned and level with the rail.

: Install the Trolley

Attach the trolley assembly to the rail and connect it to the garage door. This will enable the opener to move the door along the rail.

: Connect the Wiring

Follow the wiring instructions carefully, connecting the power cord, control wires, and safety sensors according to the provided diagrams. Use wire strippers and crimping tools as needed and secure the wires with electrical tape.

: Program and Test

Power up the garage door opener and follow the programming instructions provided in the manual. Test the opener to ensure it operates smoothly and safely.

: Adjust the Settings

Fine-tune the opener settings as needed, including the travel limits and force adjustments, to ensure the door operates correctly.

: Safety First

Make sure to check and test the safety features, such as the auto-reverse function, to ensure they are working correctly.

: Cleanup and Maintenance

Dispose of packaging materials and clean up your workspace. Regularly inspect and maintain your side mount garage door opener to ensure it functions correctly over time.

Remember, this is a general guide, and specific instructions may vary depending on the brand and model of your side mount Garage Door Repair Lantana TX. Always refer to the manufacturer’s instructions for the most accurate and up-to-date guidance. If you’re not comfortable with any part of the installation, consider hiring a professional garage door installer to ensure the job is done safely and correctly.

Coppell Gates & Garage Doors

440 Shadowcrest Ln, Coppell, TX 75019, United States

1-972-449-7776

Maintenance-Friendly Garage Doors: Ease of Care and Upkeep – Lantana Gates & Garage Doors

As a homeowner who has always appreciated a well-maintained property, I’ve come to understand the importance of choosing maintenance-friendly features when it comes to home improvement projects. One area where this principle truly shines is in the realm of garage doors. A garage door that is easy to care for and maintain not only saves time and effort but also ensures that your home remains secure and functional.

In this article, I’ll share my insights into the world of maintenance-friendly garage doors, highlighting the benefits, features to look for, and tips for keeping your garage door in top shape with minimal effort based from Garage Door Repair.

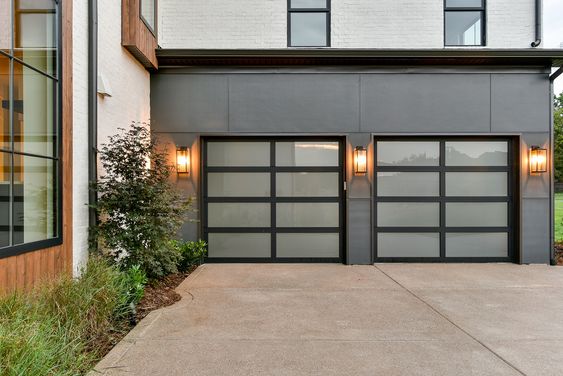
The Importance of a Maintenance-Friendly Garage Door

Before delving into the specifics, let’s explore why having a maintenance-friendly garage door is essential for homeowners:

1. Time-Saving: A garage door that requires minimal maintenance saves you time that can be better spent on other tasks and activities.

2. Cost-Efficient: Fewer maintenance requirements mean fewer expenses for repairs and replacements over time.

3. Convenience: A low-maintenance garage door is hassle-free and doesn’t disrupt your daily routine with frequent upkeep.

4. Extended Lifespan: Properly maintained garage doors last longer, meaning fewer replacements and greater longevity.

5. Enhanced Curb Appeal: A well-kept garage door contributes to your home’s aesthetics and curb appeal.

6. Improved Security: Regular maintenance ensures that your garage door operates smoothly and securely, deterring potential intruders.

Features of Maintenance-Friendly Garage Doors

When shopping for a garage door, consider the following features that contribute to ease of care and upkeep:

1. Rust-Resistant Materials: Opt for materials like aluminum or steel, which are less prone to rust and corrosion, especially in humid or coastal areas.

2. Durable Paint and Finish: Choose a garage door with a durable paint or finish that resists fading, chipping, and peeling. Low-maintenance finishes require less frequent repainting.

3. Insulation: Insulated garage doors not only improve energy efficiency but also tend to be more durable and require less maintenance over time.

4. Weatherstripping: Properly installed weatherstripping helps keep moisture and drafts out, reducing the risk of damage and the need for frequent maintenance.

5. Quality Rollers and Hardware: Invest in high-quality rollers and hardware, such as ball-bearing rollers and heavy-duty springs. Quality components require less frequent replacement.

6. Sealed Panels: Choose garage doors with sealed panels that prevent moisture from infiltrating the door’s structure.

7. Easy-to-Clean Surfaces: Look for garage doors with smooth and easy-to-clean surfaces. This makes it simple to remove dirt, dust, and grime.

8. Minimal Moving Parts: Garage doors with fewer moving parts tend to require less maintenance. Consider sectional doors that have fewer hinges and rollers than tilt-up doors.

9. Lubrication Points: Garage doors with clearly marked lubrication points make it easy to keep the door’s moving parts well-oiled and functional.

10. Warranty Coverage: A solid warranty can provide peace of mind, as it often covers the cost of repairs and replacements for a specified period.

Maintenance Tips for Your Garage Door

Even with a maintenance-friendly garage door, some upkeep is still necessary to ensure it operates smoothly and reliably. Here are some essential maintenance tips to follow:

1. Regular Inspection: Periodically inspect your garage door for signs of wear, damage, or misalignment. Look for dents, rust, loose hardware, and frayed cables.

2. Cleanliness: Keep the door and its components clean. Regularly wipe down the door’s surface, clean the tracks, and remove debris from the rollers and hinges.

3. Lubrication: Apply a silicone-based lubricant to the rollers, hinges, springs, and other moving parts. Lubrication reduces friction and prevents premature wear.

4. Tighten Hardware: Check and tighten any loose bolts, nuts, or screws in the track system, hinges, and other hardware. Loose hardware can lead to misalignment.

5. Clear Obstructions: Ensure that there are no obstructions in the tracks that could prevent the rollers from moving freely. Remove any foreign objects or debris.

6. Balance Check: Test the balance of your garage door by disconnecting the opener and manually operating the door. A properly balanced door should stay in place when partially open.

7. Weatherstripping Replacement: If you notice that the weatherstripping is damaged or no longer seals effectively, replace it promptly to prevent drafts and moisture infiltration.

8. Professional Inspection: Consider scheduling a professional inspection of your garage door and track system annually or as needed. A trained technician can identify and address potential issues.

9. Timely Repairs: If you notice any problems with your garage door, such as unusual noises, slow operation, or uneven movement, address them promptly to prevent further damage.

Low-Maintenance Materials

The choice of materials for your garage door can significantly impact its maintenance requirements. Here are some low-maintenance material options to consider:

1. Aluminum: Aluminum garage doors are lightweight, resistant to rust and corrosion, and generally low-maintenance. They often come with baked-on finishes that require minimal upkeep.

2. Steel: Steel doors are durable and resistant to dents and damage. They are available with factory-applied finishes that require little maintenance.

3. Vinyl: Vinyl garage doors are known for their durability and resistance to rust, rot, and pests. They don’t require painting and are easy to clean.

4. Fiberglass: Fiberglass doors are lightweight and resistant to dents and corrosion. They typically have a smooth, easy-to-clean surface.

Regular Maintenance Schedule

To keep your maintenance-friendly garage door in top shape, consider following this regular maintenance schedule:

Monthly:

  • Visual inspection for any visible damage, dents, or rust.
  • Cleaning of the door’s surface and tracks.
  • Lubrication of moving parts, including rollers, hinges, and springs.

Seasonally:

  • Weatherstripping inspection and replacement if necessary.
  • Balance check (if not performed monthly).

Annually:

  • Professional inspection and tune-up by a certified garage door technician.
  • Replacement of any worn or damaged components, such as springs or cables.

Conclusion: A Wise Investment

In summary, as stated in Garage Door Repair, choosing a maintenance-friendly garage door and following a regular maintenance schedule can save you time, money, and hassle in the long run. It ensures that your garage door remains a reliable and secure component of your home while enhancing its curb appeal. With the right materials, features, and maintenance practices, your garage door can be an investment that continues to pay off for years to come.

Lantana Gates & Garage Doors

1180 Central Way, Lantana, TX 76226, United States

940-400-3038

How To Paint An Aluminum Garage Door – Lantana Gates & Garage Doors

Painting an aluminum Garage Door Repair Lantana TX can significantly enhance your home’s curb appeal and protect the door from harsh weather conditions.

Whether you want to refresh the door’s current color or give it a completely new look, this step-by-step guide will help you achieve a professional-quality finish. Painting an aluminum garage door is a manageable DIY project that can be completed with the right tools, materials, and a bit of patience.

Materials and Tools

Before you begin, gather all the necessary materials and tools:

  1. Safety Equipment:
    • Safety glasses
    • Disposable gloves
    • Dust mask
  2. Cleaning Supplies:
    • Mild detergent
    • Water
    • Soft-bristle brush or sponge
    • Pressure washer (optional)
  3. Painting Supplies:
    • Aluminum-friendly primer
    • Exterior-grade paint in your desired color
    • Paintbrushes (angled and flat)
    • Paint roller and tray
    • Painter’s tape
    • Drop cloths or plastic sheeting
    • Paint stir sticks
  4. Surface Preparation Tools:
    • Sandpaper (medium and fine grit)
    • Paint scraper
    • Steel wool or a wire brush

: Prepare the Work Area

Start by clearing the area around the garage door and covering the ground with drop cloths or plastic sheeting to protect it from paint splatters. Remove any obstacles or objects that might obstruct your work.

: Safety Precautions

Put on your safety glasses, disposable gloves, and a dust mask to protect yourself from potential hazards during the project.

: Clean the Garage Door

A clean surface is crucial for proper paint adhesion. Mix mild detergent with water and use a soft-bristle brush or sponge to wash the garage door thoroughly. If the door is exceptionally dirty, consider using a pressure washer to remove stubborn grime and debris. Allow the door to dry completely before proceeding.

: Remove Loose Paint and Oxidation

Inspect the garage door for loose paint or signs of oxidation. Use a paint scraper, medium-grit sandpaper, or a wire brush to remove any peeling paint or oxidation. This step is essential to ensure a smooth finish.

: Sand the Surface

Lightly sand the entire garage door using fine-grit sandpaper. This step promotes paint adhesion and smooths out any imperfections. Wipe off any sanding dust with a clean, damp cloth.

: Apply Primer

Apply an aluminum-friendly primer to the garage door. This primer helps the paint adhere better and provides an even surface for the topcoat. Use a paintbrush to cut in around edges and corners and a paint roller for larger areas. Follow the manufacturer’s instructions regarding drying times.

: Tape and Protect

Use painter’s tape to mask off any areas you don’t want to paint, such as windows, handles, and hinges. Cover the surrounding areas with additional drop cloths or plastic sheeting to prevent accidental paint splatters.

: Apply the Paint

Once the primer is dry, it’s time to apply the paint. Stir the paint thoroughly using paint stir sticks. Use a paintbrush to paint the edges and corners of the garage door, known as “cutting in.” Then, use a paint roller to apply the paint to the larger flat areas for a smooth and even finish.

: Multiple Coats

Apply multiple coats of paint as needed to achieve the desired color and finish. Allow each coat to dry completely before applying the next one. Follow the paint manufacturer’s recommendations for drying times between coats.

: Remove the Tape

Carefully remove the painter’s tape while the final coat of paint is still slightly wet. This prevents the tape from peeling off any dried paint and ensures clean, sharp lines.

: Final Inspection

After the paint has dried completely, inspect the garage door for any imperfections. Touch up any areas that need additional paint or correction.

: Clean Up

Clean your brushes and rollers thoroughly with the appropriate cleaning solution recommended by the paint manufacturer. Dispose of used drop cloths or plastic sheeting properly.

Conclusion:

Painting an aluminum Garage Door Repair Lantana TX can transform the look of your home and provide long-lasting protection. By following these steps and using the right materials and tools, you can achieve a professional-quality finish that will enhance your home’s curb appeal for years to come. Remember to prioritize safety and take your time to ensure a job well done.

Lantana Gates & Garage Doors

1180 Central Way, Lantana, TX 76226, United States

1-940-400-3038

How To Relieve Tension On Garage Door Spring – Lantana Gates & Garage Doors

Relieving tension on a Garage Door Repair Lantana TX spring is a critical task that should only be undertaken with proper knowledge and precautions. Garage door springs are under high tension and can be dangerous to work with. If you’re not comfortable or experienced with garage door systems, it’s recommended to seek professional assistance.

However, if you have the necessary expertise and tools, here’s a guide on how to safely relieve tension on a garage door spring:

Step 1: Understand the Types of Springs
Garage doors typically have two types of springs: torsion springs and extension springs. Torsion springs are located above the garage door, while extension springs are located on the sides of the door. The following steps provide guidance for relieving tension on torsion springs. If your garage door has extension springs, consult your garage door manual or consider hiring a professional technician.

Step 2: Gather Tools and Equipment
Before you begin, make sure you have the necessary tools and equipment:

  • C-clamps or locking pliers
  • Adjustable wrench or open-end wrench
  • Stepladder or extension ladder
  • Safety goggles and gloves

Step 3: Disengage the Garage Door Opener
Before working on the springs, disengage the garage door opener by pulling the emergency release cord. This ensures that the opener won’t engage while you’re working on the springs.

Step 4: Secure the Garage Door
To prevent the door from moving unexpectedly, use C-clamps or locking pliers to secure the door to the tracks. Position the clamps just above the bottom roller of the door on both sides.

Step 5: Identify the Wind Direction
Determine the wind direction of the torsion spring. Most garage door springs are either wound clockwise (right-hand wind) or counterclockwise (left-hand wind). This information is crucial for winding or unwinding the spring properly.

Step 6: Loosen the Set Screws
Locate the set screws on the torsion spring cone. These are typically located at the ends of the spring cone. Using an adjustable wrench or open-end wrench, carefully loosen the set screws on both ends of the spring cone. Loosen them just enough to release the tension on the spring.

Step 7: Gradually Unwind the Spring
Using a winding bar inserted into one of the holes in the spring cone, gradually unwind the spring. Turn the winding bar in the direction that aligns with the wind of the spring (clockwise for right-hand wind, counterclockwise for left-hand wind). Keep a firm grip on the winding bar and move it slowly to release the tension.

Step 8: Test the Tension
Once you’ve unwound the spring, test the tension by gently lifting the garage door. The door should stay in place without any resistance. If the door is still difficult to lift or it slams shut, you may need to unwind the spring further.

Step 9: Repeat for Multiple Springs (if applicable)
If your garage door has multiple torsion springs, repeat the above steps for each spring to ensure all tension is relieved.

Step 10: Recheck and Secure the Set Screws
After the springs are unwound and the tension is released, double-check that the set screws are fully loosened. This ensures that the spring is completely disengaged.

Step 11: Proceed with Repairs
Now that the tension is relieved, you can proceed with any necessary repairs or maintenance tasks on the garage door system.

Step 12: Re-Tension the Springs (if needed)
After completing the repairs or maintenance, if you need to re-tension the springs, follow the manufacturer’s instructions carefully to wind the springs in the opposite direction from the unwinding process.

Step 13: Engage the Garage Door Opener
Once you’ve finished working on the springs and are ready to operate the garage door again, engage the garage door opener by pulling the emergency release cord back into the engaged position.

Step 14: Test the Door
Open and close the garage door manually a few times to ensure that it’s operating smoothly and without any issues.

Remember, working with Garage Door Repair Lantana TX springs can be hazardous due to the high tension involved. If you’re not experienced or comfortable with these procedures, it’s best to hire a professional garage door technician who has the expertise and tools to safely handle garage door spring maintenance and repairs. Your safety should always be the top priority.

Lantana Gates & Garage Doors

1180 Central Way, Lantana, TX 76226, United States

1-940-400-3038

Expert Tips for Maintaining and Protecting Wood Garage Doors – Lantana Gates & Garage Doors

As a homeowner who takes great pride in the classic beauty of wood, I’ve come to understand that wood garage doors require special attention to maintain their timeless appeal. Along the way, I’ve discovered the art of caring for and protecting wood garage doors to ensure they retain their charm and functionality.

In this article, I’m excited to share the expert tips I’ve gathered for effectively maintaining and safeguarding wood garage doors.

By following these guidelines from Garage Door Repair, you can relish the enduring beauty and durability of your wood garage doors for years to come.

  1. Routine Cleaning: A Crucial Step

Regular cleaning is the cornerstone of wood garage door care. I make it a point to clean off accumulated dirt, debris, and grime using a mixture of mild soap and water. Thorough rinsing afterward prevents residue buildup.

  1. Proactive Inspection and Repair

Frequent inspections are essential for spotting signs of wear, damage, or potential rot. I dedicate time to check for cracks, peeling paint, and any early indicators of water damage. Addressing minor issues promptly prevents them from evolving into more significant problems.

  1. Avoid Harsh Chemicals

To keep the wood looking its best, I steer clear of harsh chemicals or abrasive cleaners when cleaning my garage doors. These substances can strip away the protective finish and harm the wood’s surface. Opting for gentle cleaning solutions preserves the wood’s integrity.

  1. Appropriate Finishing: Shield and Safeguard

For wood garage doors, an appropriate protective finish is crucial. Depending on whether you use paint, stain, or sealant, ensure that it’s designed for exterior wood surfaces and offers reliable defense against moisture and UV rays.

  1. Periodic Painting or Staining

If your wood garage doors are painted or stained, periodic refinishing is a must. I schedule repainting or re-staining every few years to maintain their appearance and protection. The frequency might vary based on factors like climate and exposure.

  1. Prevent Wood Rot: Control Moisture

Wood is susceptible to rot when exposed to excess moisture. To prevent this, I ensure proper drainage around the garage doors and avoid placing objects against them that could trap moisture.

  1. Maintain Weather Stripping

Weather stripping along the edges of the garage door is essential for sealing out the elements. I inspect and replace weather stripping as needed to prevent drafts, water infiltration, and energy loss.

  1. Stable Humidity Levels

Wood responds to changes in humidity by expanding and contracting. I maintain a stable indoor humidity level, especially in the garage, to minimize excessive wood movement that could lead to warping.

  1. Defense Against Insects

Wood-boring insects like termites can wreak havoc on garage doors. I use pest-resistant treatments and frequently inspect for signs of infestation to protect my wood garage doors from unwelcome pests.

  1. Mind the Garage Door Opener

If your wood garage doors are automated, ensure that the opener is correctly installed and calibrated. Proper installation prevents unnecessary strain on the door and prolongs its lifespan.

  1. Benefit of Overhangs

Positioning wood garage doors under a roof overhang offers extra protection from direct sunlight, rain, and snow, which can extend the doors’ life span.

  1. Gentle Maintenance Tools

When performing maintenance, I opt for soft-bristle brushes and clean, damp cloths. These tools effectively remove dirt without causing scratches or damage to the wood’s surface.

  1. Trimming Vegetation

Overgrown bushes or trees near the garage door can lead to scratches and damage as branches rub against the wood. Regularly trimming vegetation helps prevent such issues.

  1. Professional Inspection

Engaging a professional garage door expert for periodic inspections provides a comprehensive evaluation of wood garage doors. Expert recommendations for maintenance and repairs ensure the doors stay in prime condition.

In summary, as stated from Garage Door Repair, my journey with wood garage doors has shown me that their beauty requires consistent care and protection. By incorporating regular cleaning, suitable finishing, prompt repairs, and professional evaluations, I can safeguard my wood garage doors against wear and tear while preserving their elegance. These expert tips, combined with my dedication to maintenance, allow me to revel in the timeless charm that wood garage doors add to my home. With a commitment to proper care, I can ensure that these doors remain both visually appealing and fully functional for the years to come.

Lantana Gates & Garage Doors

1180 Central Way, Lantana, TX 76226, United States

940-400-3038

How to Adjust Travel Down Setting on Garage Door-Lantana Garage & Overhead Doors

Adjusting the travel down setting on a Garage Door Repair Lantana TX is an important task to ensure that the door closes properly and safely.

Follow the steps below to make the necessary adjustments.

  1. Familiarize Yourself with the Garage Door Opener: Start by understanding the different components of your garage door opener. Locate the motor unit, which is typically installed on the ceiling of your garage. This unit controls the opening and closing of the garage door.
  2. Locate the Travel Down Adjustment Screw: Look for the travel down adjustment screw on the motor unit. It is usually labeled and can be found near the back of the unit. This screw controls how far the garage door descends when closing.
  3. Prepare for Adjustment: Ensure that the garage door is closed completely before making any adjustments. Also, make sure there are no obstructions in the door’s path, as this can interfere with the adjustment process.
  4. Identify the Travel Down Direction: Determine which direction you need to adjust the travel down setting. If the door closes too far or slams shut, you will need to decrease the travel down distance. If the door doesn’t close all the way or reverses before reaching the floor, you will need to increase the travel down distance.
  5. Adjusting the Travel Down Setting: Use a flathead screwdriver or a specific tool provided with your garage door opener to adjust the travel down setting. Turn the screw in small increments, either clockwise or counterclockwise, depending on the direction you determined in the previous step.
    • Decreasing the Travel Down Distance: To decrease the travel down distance, turn the screw clockwise (to the right) in small increments. Each adjustment should be about a quarter-turn or less. Test the door after each adjustment to check the closing position. Repeat this process until the door closes to the desired position without slamming shut.
    • Increasing the Travel Down Distance: To increase the travel down distance, turn the screw counterclockwise (to the left) in small increments. Again, each adjustment should be about a quarter-turn or less. Test the door after each adjustment to ensure that it closes all the way to the floor without reversing. Repeat the process until the desired closing position is achieved.
  6. Test the Adjusted Setting: After each adjustment, open and close the garage door several times to confirm that it closes to the desired position without any issues. Observe the door’s movement and listen for any unusual noises. If necessary, continue making small adjustments until the door operates smoothly and closes correctly.
  7. Safety Precautions: While adjusting the travel down setting, ensure that no one is standing or positioned beneath the garage door. Keep a safe distance and pay close attention to the door’s movement during the adjustment process.

Remember, Garage Door Repair Lantana TX openers can vary in design and features, so it’s always recommended to consult the manufacturer’s manual for specific instructions and safety guidelines related to your model.

Lantana Garage & Overhead Doors

3501 FM 407 #15, Lantana, TX 76226

940-400-3038

Powered by WordPress & Theme by Anders Norén