Garage Door Blog In Your Area

Category: Garage Door Page 2 of 39

Fixing Misaligned Tracks: Ensuring Smooth Movement of Your Garage Door – Rancho Park Garage & Overhead Doors

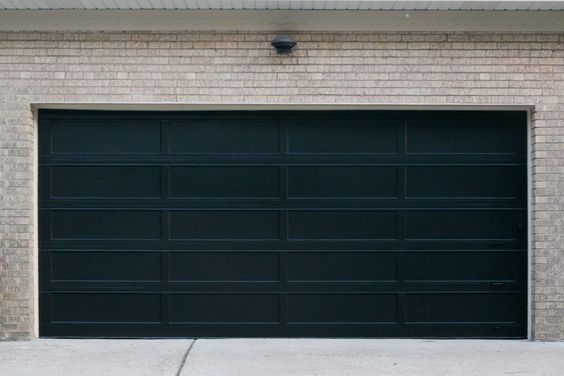
As a homeowner who takes pride in the seamless functionality of my living space, the garage door stands as a gateway to convenience and security. However, in the midst of its rhythmic ascent and descent, I found myself facing a common challenge—misaligned tracks. The unsettling noises and jerky movements were not only a source of frustration but also a potential harbinger of more significant issues.

In this journey of home maintenance, I delved into the art of fixing misaligned tracks, unraveling the intricacies of this common problem to ensure the continuous smooth operation of my garage door based from Garage Door Repair.

The Symphony of Movement: Understanding the Role of Garage Door Tracks

Before embarking on the mission to fix misaligned tracks, it’s essential to grasp the fundamental role these unassuming components play in the operation of a garage door. The tracks serve as guides, facilitating the smooth movement of the door as it travels along its designated path. Comprising vertical and horizontal sections, the tracks provide stability and precision to ensure the door’s proper alignment during every open and close cycle.

Detecting the Signs: Indicators of Misaligned Tracks

The journey to fixing misaligned tracks began with a keen awareness of the subtle signs indicating a problem. Recognizing these indicators allowed me to address the issue promptly, preventing further damage and ensuring the longevity of my garage door system. Here are some common signs of misaligned tracks:

1. Unusual Noises: The Symphony Gone Awry

One of the most apparent signs of misaligned tracks is the emergence of unusual noises during the operation of the garage door. Screeching, scraping, or grinding sounds can indicate friction and misalignment between the door rollers and the tracks.

2. Jerky Movements: The Stutter in Smooth Transitions

Smooth and fluid movement is the hallmark of a well-maintained garage door. If you notice jerky or uneven movements during the door’s travel, it may be a clear indication of misaligned tracks hindering the seamless operation.

3. Gaps or Spaces: Misalignment Manifested

Inspect the spaces between the rollers and the tracks. Any noticeable gaps or irregularities in alignment may signify a misalignment issue. Misaligned tracks can lead to uneven spacing, affecting the overall stability of the garage door.

4. Visual Inspection: A Close-Up Examination

Take a moment to visually inspect the tracks. Any visible gaps, twists, or distortions in the tracks themselves are red flags indicating misalignment. A thorough examination can reveal the extent of the issue and guide the subsequent steps in the fixing process.

The DIY Approach: Navigating the Steps to Fix Misaligned Tracks

Armed with a basic understanding of the signs of misaligned tracks, I decided to take on the challenge with a do-it-yourself (DIY) approach. Here are the steps I followed to address the misalignment issue:

1. Safety First: Disconnect the Garage Door Opener

Before delving into any repairs, prioritize safety. Disconnect the garage door opener to prevent accidental activation while working on the tracks. This ensures a secure working environment and minimizes the risk of injury.

2. Inspect and Identify the Misalignment

Begin the fixing process by visually inspecting the tracks. Identify the points where misalignment has occurred, taking note of any gaps, twists, or distortions. Understanding the specific areas requiring adjustment is crucial for an effective repair.

3. Loosen the Mounting Hardware: Creating Room for Adjustment

Using a wrench or socket set, loosen the nuts and bolts securing the brackets that hold the misaligned tracks. This step creates the necessary flexibility to adjust the tracks and realign them with precision.

4. Gentle Tapping for Alignment: Nudging Back into Place

With the mounting hardware loosened, gently tap the misaligned tracks with a rubber mallet or a block of wood. The goal is to nudge the tracks back into their proper alignment. Exercise caution to avoid causing further damage, and use gradual force until the tracks are realigned.

5. Check for Level and Alignment: Precision Matters

After tapping the tracks, use a level to ensure they are perfectly aligned both horizontally and vertically. Adjust as needed until the tracks are level and parallel to each other. This step is crucial for the smooth movement of the garage door.

6. Tighten the Mounting Hardware: Securing the Adjustment

Once the tracks are properly aligned, tighten the mounting hardware securely. Ensure that the brackets are snugly fastened to prevent any future misalignment. The secure attachment of the tracks is essential for the long-term stability of the garage door system.

7. Lubricate Moving Parts: Promoting Smooth Operation

To complement the realignment process, apply a generous amount of lubricant to the rollers, tracks, and hinges. Lubrication minimizes friction and ensures smooth movement, reducing the likelihood of future misalignments.

8. Test the Garage Door: Confirming Success

With the tracks realigned and the hardware tightened, test the garage door by manually raising and lowering it. Listen for any unusual noises and observe the door’s movement to confirm that the misalignment issue has been successfully addressed.

Professional Intervention: When to Seek Expert Assistance

While the DIY approach proved effective for addressing minor misalignment issues, there are instances where professional intervention becomes necessary. Consider seeking expert assistance if:

  • The misalignment is severe or extensive, requiring specialized tools and expertise.
  • DIY attempts do not resolve the issue, and the garage door continues to exhibit signs of misalignment.
  • The garage door appears to be unbalanced or tilting, indicating potential issues with the spring system.

Professional garage door technicians possess the knowledge and tools to tackle complex misalignment issues, ensuring a comprehensive and lasting solution.

Preventive Measures: Preserving Alignment Over Time

As I successfully addressed the misaligned tracks, I also embraced preventive measures to preserve the alignment of my garage door over time. Here are some tips to prevent future misalignment issues:

1. Regular Inspection: A Proactive Approach

Incorporate regular visual inspections of the garage door tracks into your home maintenance routine. Look for signs of wear, damage, or potential misalignment. Early detection allows for prompt intervention and prevents issues from escalating.

2. Tighten Loose Hardware: Securing Stability

Periodically check and tighten the nuts and bolts securing the brackets and mounting hardware. Loose hardware is a common precursor to misaligned tracks, and proactive tightening helps maintain stability.

3. Clear Debris: Unobstructed Pathways

Keep the tracks free from debris, dust, and any obstructions. Regularly clean the tracks using a soft brush or cloth to ensure unimpeded movement. Debris accumulation can contribute to misalignments over time.

4. Lubricate Moving Parts: Friction-Free Operation

Maintain a lubrication schedule for the moving parts of the garage door, including the rollers, tracks, and hinges. Lubrication reduces friction and minimizes the risk of misalignments caused by increased resistance.

5. Professional Maintenance: Expert Oversight

Consider scheduling professional maintenance at regular intervals. Professional technicians can conduct thorough inspections, identify potential issues, and perform preventive adjustments to preserve the optimal alignment of the garage door.

Conclusion: A Smooth Journey of Home Maintenance

As I reflect on the journey of fixing misaligned tracks, I am reminded of the importance of proactive home maintenance. Misaligned tracks, once a source of frustration, became an opportunity to deepen my understanding of the garage door system and enhance its longevity.

The DIY approach not only provided a cost-effective solution but also empowered me to take an active role in preserving the smooth operation of my garage door. With the tracks aligned, the once-disrupted symphony of movement was restored, and the garage door became a testament to the harmonious fusion of function and form within my living space.

Overall, based from Garage Door Repair and in the realm of home ownership, the garage door serves as a reliable sentinel, guarding the entry to my abode. With misaligned tracks addressed and preventive measures in place, I can navigate the coming and going of each day with the assurance that my garage door will continue to operate seamlessly—a testament to the power of informed intervention and the joys of a smoothly running home.

Rancho Park Garage & Overhead Doors

2522 Aiken Ave, Los Angeles, CA 90064, United States

213-214-2651

Mastering the Art of Resetting Your Garage Door Opener’s Travel Limits – Southern Home Creations Garage Doors & Openers

As a homeowner who relies on the convenience and security of a garage door opener, understanding its intricate mechanisms is essential. Among the critical components of a garage door opener are the travel limits, which dictate how far the door should open and close. Over time, these limits may need adjustment due to factors such as wear and tear or changes in the door’s operation.

In this comprehensive Garage Door Repair Suwanee GA guide, I’ll walk you through the step-by-step process of resetting your garage door opener’s travel limits, ensuring smooth and precise operation for years to come.

Introduction to Garage Door Opener Travel Limits:

Garage door opener travel limits, also known as the “open” and “close” limits, determine the distance that the door travels during its opening and closing cycles. These limits are set to ensure that the door fully opens and closes without hitting the floor or ceiling, preventing damage to the door or opener system. Over time, factors such as temperature fluctuations, prolonged use, or mechanical issues may cause the travel limits to become misaligned, resulting in incomplete door movements or improper operation.

Why Resetting Travel Limits is Necessary:

Resetting your garage door opener’s travel limits is necessary to maintain optimal performance and safety. When the limits are misaligned, the door may not close completely, leaving a gap that compromises security or allowing the door to hit the ground with excessive force, leading to potential damage. By recalibrating the travel limits, you can ensure that the door operates smoothly, securely, and without unnecessary strain on the opener system.

Step-by-Step Guide to Resetting Garage Door Opener Travel Limits:

Before proceeding with the reset process, it’s essential to gather the necessary tools and equipment:

  1. Step ladder or stable platform: Ensure safe and convenient access to the garage door opener unit.
  2. Owner’s manual: Refer to the manufacturer’s instructions for specific guidance on resetting travel limits.
  3. Marker or tape: Use to mark reference points on the garage door track for accurate adjustments.
  4. Screwdriver or hex wrench: Depending on your opener model, you may need a tool to adjust the limit settings.

Now, let’s dive into the step-by-step process of resetting your garage door opener’s travel limits:

Step 1: Access the Garage Door Opener Unit: Locate the garage door opener unit, typically mounted on the ceiling of the garage near the center of the door track. Use a step ladder or stable platform to reach the opener safely.

Step 2: Locate the Limit Adjustment Controls: Refer to your owner’s manual to identify the limit adjustment controls on your garage door opener. These controls are usually located on the back or side of the opener unit and may be labeled as “travel limits” or “open/close force adjustments.”

Step 3: Activate the Manual Release Mechanism: Before adjusting the travel limits, it’s essential to disengage the automatic operation of the garage door opener. Locate the manual release mechanism on the opener unit and activate it according to the manufacturer’s instructions. This step ensures that you can manually open and close the door during the adjustment process.

Step 4: Mark Reference Points on the Door Track: Using a marker or tape, mark reference points on the garage door track to indicate the current positions of the door’s fully open and closed positions. These reference points will help you accurately adjust the travel limits later.

Step 5: Adjust the Open Limit: Locate the open limit adjustment control on the garage door opener. Depending on your opener model, you may need to turn a screw or adjust a dial to increase or decrease the open limit setting. Refer to your owner’s manual for specific instructions on making adjustments.

Step 6: Test the Door’s Opening Movement: After adjusting the open limit, manually close the garage door and then activate the opener to open the door automatically. Observe the door’s movement and ensure that it stops at the desired fully open position. If necessary, fine-tune the open limit setting until the door reaches the correct position.

Step 7: Adjust the Close Limit: Next, locate the close limit adjustment control on the garage door opener. Follow the same process as adjusting the open limit, turning the screw or dial to increase or decrease the close limit setting. Again, refer to your owner’s manual for specific guidance.

Step 8: Test the Door’s Closing Movement: Manually open the garage door and then activate the opener to close the door automatically. Verify that the door stops at the desired fully closed position without hitting the ground or floor. If adjustments are needed, repeat the process until the door closes properly.

Step 9: Secure the Limit Adjustment Controls: Once you’re satisfied with the travel limit adjustments, secure the adjustment controls on the garage door opener to prevent accidental changes. Tighten any screws or locking mechanisms according to the manufacturer’s instructions.

Step 10: Reactivate Automatic Operation: Finally, disengage the manual release mechanism on the garage door opener to reactivate automatic operation. Test the door’s opening and closing movements several times to ensure that it operates smoothly and stops at the correct positions.

Conclusion:

Overall, based from Garage Door Repair Suwanee GA, resetting your garage door opener’s travel limits is a straightforward process that can significantly improve the performance and safety of your garage door system. By following the step-by-step guide outlined above and referring to your owner’s manual for specific instructions, you can recalibrate the travel limits with confidence. Regular maintenance and occasional adjustments ensure that your garage door operates smoothly, reliably, and without unnecessary strain on the opener mechanism. With proper care and attention, your garage door opener will continue to provide convenient access to your home for years to come.

Southern Home Creations Garage Doors & Openers

4110 Tench Rd Suite D, Suwanee, GA 30024, United States

770-831-0301

Repairing Garage Door Brackets: Ensuring Proper Attachment to Tracks – Highland Garage Doors & Gate

As a homeowner, my garage door is more than just an entry point – it’s a guardian, a silent sentinel that stands between my haven and the outside world. However, when the seamless ballet of its movements is disrupted by issues with the brackets, it’s a call to action.

In reference to Garage Door Repair, I embark on a journey of understanding and repair, unraveling the intricacies of repairing garage door brackets to ensure their proper attachment to the tracks. From identification to restoration, I explore the steps and considerations involved in mending this critical link, so my garage door continues to serve its purpose seamlessly.

The Unsung Heroes: Garage Door Brackets and Their Role

Before delving into the repair process, understanding the pivotal role of garage door brackets is essential. Brackets serve as the anchor points connecting the garage door tracks to the door itself. Properly attached brackets are crucial for maintaining the alignment and stability of the entire system, ensuring smooth and efficient door operation.

Signs of Bracket Issues: Recognizing the Telltale Signs

Identifying the signs of bracket issues is the first step in addressing the problem promptly. Common indicators include:

  1. Visible Misalignment: Inspect the garage door tracks for any signs of misalignment or gaps between the tracks and the door. Misaligned brackets can lead to uneven movements.
  2. Unusual Noises: If the garage door produces unfamiliar sounds during operation, such as scraping, grinding, or banging, it may indicate bracket-related issues. These sounds often result from friction between misaligned brackets and the tracks.
  3. Visible Damage: Examine the brackets for visible signs of damage, such as cracks, bends, or breaks. Damaged brackets compromise the structural integrity of the entire system.
  4. Uneven Door Movement: If the garage door exhibits uneven movement or tends to get stuck at certain points during its operation, it may be a result of bracket issues affecting the smooth gliding along the tracks.
  5. Loose or Missing Hardware: Check for loose bolts, nuts, or screws securing the brackets to the tracks or the garage door. Missing or loose hardware can contribute to bracket-related problems.

Safety First: Preparing for Repair

Before diving into the repair process, prioritizing safety is paramount. The garage door is a heavy component, and addressing bracket issues requires caution. Here are essential safety precautions to take:

  1. Disconnect the Power: If the garage door is equipped with an automatic opener, disconnecting the power source ensures that the door won’t unexpectedly activate during repairs.
  2. Secure the Door: Prop the garage door open using a sturdy object or enlist the help of a second person to hold it in place. This prevents unexpected movements while working on the brackets.
  3. Wear Protective Gear: Safety goggles and gloves shield against potential injuries from sharp edges or debris.

Assessing Bracket Damage: Understanding the Severity of the Issue

Not all bracket issues are created equal, and the severity of the damage determines the appropriate course of action. Assessing the extent of bracket damage involves:

  1. Visual Inspection: Examine the brackets visually, looking for any noticeable misalignment, cracks, bends, or missing hardware. Note the location and severity of the damage.
  2. Operational Test: Run the garage door through a few cycles to observe its movement. Pay attention to any resistance, unusual sounds, or misalignment during the opening and closing process.
  3. Hardware Tightness: Check the tightness of the bolts, nuts, and screws securing the brackets to the tracks and the garage door. Loose hardware may contribute to bracket issues.

Repairing Minor Bracket Issues: A DIY Approach

For minor bracket issues, a do-it-yourself approach to repair may be sufficient. Follow these steps for basic bracket repair:

  1. Gather the Tools:
    • Adjustable wrench
    • Socket set
    • Screwdriver
    • Level
    • Replacement hardware (if needed)
  2. Inspect and Align:
    • Visualize the alignment of the brackets with the tracks and the garage door. If misalignment is evident, use a level to adjust the brackets accordingly.
  3. Tighten Hardware:
    • Use an adjustable wrench or a socket set to tighten any loose bolts, nuts, or screws securing the brackets. Ensure that the hardware is snug but not overtightened.
  4. Replace Damaged Hardware:
    • If the hardware is damaged or missing, replace it with new, appropriately sized bolts, nuts, or screws. Using the correct hardware is crucial for maintaining the structural integrity of the brackets.
  5. Test Door Operation:
    • Reconnect the power to the automatic opener and test the garage door’s operation. Observe the movement of the door, listen for any unusual sounds, and ensure that the brackets are properly aligned.
  6. Lubrication:
    • Apply a silicone-based lubricant to the brackets and tracks. Lubrication reduces friction, ensuring smooth movement and preventing premature wear.

Professional Intervention for Severe Bracket Issues

For severe bracket issues or extensive damage, seeking professional intervention is advisable. Attempting to address severe bracket problems without the expertise and equipment of a professional may lead to further damage. In such cases:

  1. Consult a Professional Technician:
    • Contact a professional garage door technician with experience in bracket repairs.
    • Schedule an inspection to assess the severity of the bracket damage and determine the best course of action.
  2. Bracket Replacement:
    • Severe bracket damage may warrant replacement. A professional technician can assess the condition of the brackets and recommend appropriate replacements.
  3. Address Underlying Issues:
    • A professional inspection provides an opportunity to identify and address any underlying issues contributing to the bracket damage, such as misaligned tracks or other structural issues.

Common Issues and Troubleshooting Tips: Navigating the Path to Resolution

During the repair process, certain issues may persist or arise, necessitating additional attention. Here are common scenarios and troubleshooting tips:

  • Persistent Misalignment: If the brackets continue to misalign after adjustment, inspect the tracks for irregularities. Misaligned tracks can contribute to bracket issues.
  • Unusual Sounds During Operation: If unusual sounds persist after bracket repair, check for loose hardware elsewhere in the garage door system, such as hinges or rollers. Tighten any components that may be contributing to the noise.
  • Uneven Movement: In cases of persistent uneven movement, inspect the garage door springs for signs of wear or imbalance. Springs play a crucial role in supporting the door’s weight and ensuring smooth operation.
  • Professional Assessment: If issues persist or if there are signs of wear, such as fraying cables or damaged components, it’s advisable to consult a professional technician for a thorough inspection and necessary repairs.

Final Checks and Observations: Ensuring Proper Functionality

After repairing the garage door brackets, conducting final checks and observations ensures that the entire system operates seamlessly. Perform the following steps:

  1. Operate the Door Manually: Open and close the garage door manually to assess its smoothness and alignment. Ensure that it moves along the tracks without hesitation or resistance.
  2. Test Automatic Opener: Reconnect the power to the automatic opener and test its functionality. Observe the door’s movement, listening for any unusual sounds or vibrations.
  3. Check Balance: A well-balanced garage door should stay in place when opened halfway. If the door tends to move upward or downward, it may indicate an imbalance that requires professional attention.
  4. Inspect for Persistent Issues: If any issues persist or if there are signs of wear, such as fraying cables or damaged components, it’s advisable to consult a professional technician for a thorough inspection and necessary repairs.

Conclusion: Strengthening the Foundation

According to Garage Door Repair, as I stand before my garage door, now restored to its seamless operation, a sense of assurance washes over me. Repairing garage door brackets is not just a technical task; it’s a commitment to the foundational strength of the gateway to my home.

In the tapestry of homeownership, the garage door serves as a sentinel, offering protection and functionality. By unraveling the complexities of bracket issues and navigating the repair process with care and precision, I’ve not just mended metal; I’ve strengthened the foundation of my home, ensuring that the gateway stands firm for years to come.

Highland Garage Doors & Gate

28355 Base Line St, Highland, CA 92346, United States

909-315-4678

C.H.I. Overhead Doors: Residential and Commercial Options – Hesperia Overhead & Garage Doors

Living in a region that experiences extreme temperatures, the functionality of every aspect of my home became a crucial consideration. However, one area that often goes overlooked in the battle against the elements is the garage. In my quest to create a comfortable and energy-efficient living space, I embarked on a journey into the realm of garage door insulation tailored for extreme temperatures.

This narrative shares my experiences, discoveries, and the transformative impact of insulating my garage door against the relentless forces of both scorching summers and frigid winters by following Garage Door Repair.

1. The Underrated Hero: Garage Door Insulation in Extreme Climates

The garage, often viewed as a utilitarian space, is an integral part of any home. Whether it serves as a storage area, a workshop, or simply a shelter for vehicles, its insulation is a key factor in maintaining a comfortable indoor environment. Extreme temperatures pose unique challenges, and the garage door, being a significant surface area, becomes a potential source of heat loss in winter and heat gain in summer. Insulating this often underrated element proved to be a game-changer in my pursuit of a thermally efficient home.

2. The Summer Struggle: Battling Heat Infiltration

The scorching summers in my region brought to light the first challenge – heat infiltration through the garage door. Uninsulated garage doors allow the relentless sun to penetrate, turning the garage into a heat trap that radiates warmth into the living space. The consequences were evident not only in discomfort but also in increased energy bills as the air conditioning system worked tirelessly to counteract the heat seeping through the garage.

3. The Winter Chill: Confronting Cold Drafts

As winter set in, a new adversary emerged – cold drafts infiltrating the garage. Uninsulated garage doors allow the frigid air to permeate, transforming the garage into an icy space that poses challenges for both stored items and the overall temperature regulation of the home. The inefficiency of the heating system became apparent as it struggled to maintain warmth against the relentless cold emanating from the garage.

4. The Revelation: Garage Door Insulation as a Comprehensive Solution

The realization that the garage door was a significant factor in the battle against extreme temperatures prompted a comprehensive exploration of insulation options. From traditional materials to cutting-edge solutions, I sought a balance between effectiveness, cost-efficiency, and ease of installation. The journey revealed several key aspects that became instrumental in my decision-making process.

5. Types of Garage Door Insulation: Unveiling the Options

My exploration into garage door insulation unveiled various types, each with its unique characteristics and benefits. Understanding these options was crucial in making an informed decision tailored to the specific demands of extreme temperatures.

  • Polystyrene Insulation: Polystyrene panels, with their lightweight and rigid structure, presented a cost-effective and efficient option. These panels, inserted into the garage door sections, provided a barrier against heat transfer. Their versatility and ease of installation made them an attractive choice for homeowners seeking a practical solution.
  • Polyurethane Foam Insulation: Polyurethane foam insulation emerged as a high-performance option. Injected into the garage door sections, polyurethane foam expands and solidifies, creating a seamless and highly insulating layer. The superior thermal resistance of polyurethane made it an ideal choice for extreme climates, offering enhanced energy efficiency and climate control.
  • Reflective Foil Insulation: Reflective foil insulation, comprising layers of reflective material, proved effective in reducing radiant heat transfer. Installed between the garage door panels, this type of insulation reflects the sun’s rays during summer, preventing heat absorption, and helps retain warmth during winter. Its reflective properties make it particularly suitable for regions with intense sunlight.
  • Batt Insulation: Traditional batt insulation, commonly used in walls and attics, also found its application in garage doors. Fiberglass or other insulating materials are fitted between the door panels, creating a thermal barrier. While effective, batt insulation may require professional installation due to its specific application in garage doors.

6. DIY vs. Professional Installation: Weighing the Options

Armed with knowledge about the types of insulation, the next decision was whether to embark on a do-it-yourself (DIY) project or enlist professional help. Factors such as personal skill level, time constraints, and the complexity of the chosen insulation method played a pivotal role in this decision.

  • DIY Installation: Opting for a DIY installation allowed me to take control of the process, save on labor costs, and work at my own pace. For simpler insulation methods, such as adding reflective foil or polystyrene panels, a DIY approach proved feasible. However, it’s crucial to follow manufacturer instructions meticulously to ensure optimal effectiveness.
  • Professional Installation: In cases where the insulation method involved more intricate processes, such as injecting polyurethane foam, seeking professional installation became a prudent choice. Professional installers possess the expertise, tools, and experience to execute complex insulation methods seamlessly, ensuring maximum efficiency.

7. Energy Efficiency and Cost Savings: The Tangible Benefits

One of the most compelling outcomes of insulating my garage door for extreme temperatures was the tangible impact on energy efficiency and cost savings. The insulation acted as a thermal barrier, preventing the transfer of heat in summer and cold in winter. This resulted in a more stable indoor temperature, reducing the workload on the heating and cooling systems.

  • Reduced Energy Bills: With the garage acting as a buffer zone against extreme temperatures, the demand on the HVAC system decreased significantly. The reduction in energy consumption translated into lower monthly utility bills, providing a return on the investment made in garage door insulation.
  • Extended Lifespan of HVAC Systems: The alleviation of strain on the heating and cooling systems not only reduced energy bills but also contributed to the extended lifespan of these systems. With less frequent and less intense operation, the HVAC components experienced less wear and tear.

8. Climate-Specific Considerations: Tailoring Insulation for California Living

Living in California, where climates can vary widely from coastal regions to inland areas, the insulation approach needed to be tailored to the specific climate challenges of the region.

  • Coastal Regions: Coastal regions often experience milder temperatures but can be prone to humidity. Reflective foil insulation, with its ability to resist radiant heat and reflect sunlight, proved effective in these areas. Additionally, choosing materials resistant to moisture helped combat the effects of humidity.
  • Inland Areas: Inland areas, characterized by more significant temperature fluctuations, benefited from insulation with a higher thermal resistance. Polyurethane foam insulation, with its superior insulating properties, became a suitable choice for combating the extremes of both hot summers and cold winters.

9. The Impact on Garage Functionality: A Comfortable and Versatile Space

Beyond the energy efficiency and cost savings, the insulation of my garage door transformed the functionality of the space. The garage evolved from a temperature-extreme zone into a comfortable and versatile area with expanded usability.

  • Workshop and Workspace: With a more stable temperature, the garage became an ideal space for a workshop or home office. Whether pursuing DIY projects, engaging in hobbies, or working from home, the insulated garage provided a comfortable and controlled environment.
  • Temperature-Sensitive Storage: Items stored in the garage, particularly those sensitive to temperature fluctuations, benefited from the insulation. Whether it was electronics, seasonal decorations, or household supplies, the consistent temperature helped preserve the integrity of stored items.
  • Extended Living Space: The insulated garage became an extension of the living space, accommodating gatherings, family activities, or simply providing a comfortable area to relax. This versatility added an extra dimension to the overall functionality of my home.

10. Lessons Learned: The Importance of Comprehensive Insulation

Through the journey of insulating my garage door for extreme temperatures, I gleaned valuable lessons that extend beyond the immediate benefits of energy efficiency and comfort.

  • Comprehensive Approach: Insulating the garage door was just one component of a comprehensive approach to home insulation. Addressing other areas, such as walls, windows, and the garage itself, contributed to a holistic solution that maximized the benefits of insulation.
  • Regular Maintenance: Insulation, like any component of a home, requires regular maintenance. Periodic checks for wear and tear, proper sealing of gaps, and ensuring the continuity of insulation materials are essential for long-term effectiveness.
  • Adaptability to Changing Needs: Homeowners should consider the adaptability of insulation solutions to changing needs. Whether converting the garage into a living space or accommodating different uses, the insulation should cater to evolving lifestyle requirements.

11. The Satisfaction of Year-Round Comfort

As I reflect on the journey into garage door insulation for extreme temperatures, the satisfaction of year-round comfort stands out as the ultimate reward. The garage, once a zone of temperature extremes, now seamlessly integrates into the overall comfort of my home. Whether facing the heat of summer or the chill of winter, the insulated garage door has become a guardian against the elements, contributing to a more enjoyable and energy-efficient living experience.

Conclusion: Transforming the Garage into an Oasis of Comfort

In the battle against extreme temperatures, the garage door emerged as a critical frontier in my quest for a comfortable and energy-efficient home. The insulation of this often-overlooked element transformed the garage into an oasis of comfort, offering a respite from the intensity of both summer and winter.

From the choice of insulation materials to the decision between DIY and professional installation, every step in the process played a role in shaping the outcome. The impact on energy efficiency, cost savings, and the expanded functionality of the garage underscored the significance of this undertaking.

Overall, based from Garage Door Repair, as I open and close the garage door, I am reminded of the transformative power of insulation. No longer a mere barrier between the indoors and the outdoors, the garage door has become a partner in creating a home that adapts to the ever-changing demands of California living. The journey into garage door insulation was not just a practical investment; it was a commitment to comfort, sustainability, and the creation of a living space that harmonizes with the rhythm of extreme temperatures.

Hesperia Overhead & Garage Doors

18361 Bear Valley Rd # 4, Hesperia, CA 92345, United States

760-990-1054

Can I Replace My Garage Door Springs with a Different Type? – Braintree Garage & Overhead Doors

As a homeowner faced with the need to replace my garage door springs, the question of whether I could opt for a different type loomed large.

I’ll share my journey of delving into the intricacies of garage door springs, understanding the implications of a switch, and the factors to consider when contemplating such a pivotal decision as stated in Garage Door Repair.

Chapter 1: The Need for Replacement

The journey began when the telltale signs of wear and tear on my garage door springs became apparent. The occasional squeaks, hesitations, and visible gaps signaled that a replacement was inevitable. This prompted me to explore the possibilities, leading me to question whether I could introduce a different type of spring into the equation.

Chapter 2: The Two Primary Types of Garage Door Springs

Understanding the options at hand was paramount. Garage doors primarily use two types of springs—torsion springs and extension springs. Torsion springs, mounted above the door, utilize torque to counterbalance the weight. On the other hand, extension springs, often seen on either side of the door, stretch and contract to provide the necessary force. Each type has its unique characteristics and applications.

Chapter 3: The Implications of Switching Spring Types

The pivotal question arose: could I replace my existing torsion springs with extension springs, or vice versa? While the idea seemed plausible, it quickly became apparent that such a switch wasn’t as straightforward as it sounded. The entire garage door system is calibrated to work with a specific type of spring, considering factors like weight distribution, size, and the mechanics of the door.

Chapter 4: Weight Distribution and Garage Door Dynamics

A critical factor in the spring replacement dilemma is the weight distribution of the garage door. Torsion springs are adept at handling heavier doors, distributing the load more evenly. Extension springs, on the other hand, work well with lighter doors. Attempting to replace torsion springs with extension springs on a heavy door could result in inadequate counterbalance, affecting the door’s smooth operation and potentially causing damage.

Chapter 5: Compatibility with Garage Door Mechanism

Garage door systems are engineered with specific types of springs in mind. The pulley systems, cables, and overall mechanics are designed to harmonize with either torsion or extension springs. Introducing a different type might disrupt this delicate balance, leading to operational issues, increased strain on components, and potential safety hazards.

Chapter 6: Safety Considerations

Safety is paramount when dealing with garage door springs. Torsion springs, by design, are generally considered safer because they are mounted above the door, reducing the risk of accidents. Extension springs, while common, pose a higher risk of snapping, potentially causing injury or property damage. Understanding these safety dynamics is crucial when contemplating a switch.

Chapter 7: Seeking Professional Guidance

Realizing the complexities involved, I sought the expertise of a professional garage door technician. Their assessment of my specific garage door system, weight distribution, and compatibility considerations proved invaluable. They emphasized that garage door spring replacement is not a one-size-fits-all endeavor and requires a tailored approach based on the unique characteristics of each garage door.

Chapter 8: Cost Considerations

While contemplating a switch between garage door spring types, the financial aspect played a role in my decision-making process. The cost of retrofitting the entire system to accommodate a different type of spring, including potential modifications to the pulley system and cables, added up. Balancing the desire for change with practical financial considerations became a crucial aspect of the decision.

Chapter 9: Exploring Alternative Solutions

Rather than replacing one type of spring with another, exploring alternatives within the same category emerged as a viable solution. Upgrading to high-cycle torsion springs or opting for corrosion-resistant extension springs provided enhancements without the need for a drastic switch in spring types. This compromise allowed me to address wear and tear concerns without compromising the integrity of the garage door system.

Chapter 10: Conclusion – A Springs Harmony

In conclusion, the quest to replace garage door springs with a different type unfolded as a journey of discovery. Understanding the intricacies of torsion and extension springs, considering weight distribution, compatibility, and safety factors, and seeking professional guidance were pivotal in making an informed decision. While the desire for change was present, the harmony between the existing garage door system and its springs prevailed as the guiding principle.

Overall, as per Garage Door Repair, for homeowners contemplating a similar journey, the key takeaway is to approach garage door spring replacement with a holistic understanding of the system’s dynamics. While change can be enticing, the integrity and safety of the garage door should remain at the forefront of decision-making. In this exploration, I discovered that sometimes, embracing the inherent harmony of the existing setup is the most prudent and effective path forward.

Braintree Garage & Overhead Doors

0 Campanelli Dr, Braintree, MA 02184, United States

781-678-4910

Proven Tips for Extending the Lifespan of Your Garage Door Springs – Dedham Garage & Overhead Doors

As a homeowner with a keen interest in maintenance and longevity, I embarked on a quest to unravel the secrets of extending the lifespan of my garage door springs.

In this article, I share my journey, insights, and a comprehensive guide for fellow homeowners looking to maximize the durability of this critical component as stated in Garage Door Repair.

Chapter 1: Understanding the Role of Garage Door Springs

Before delving into maintenance strategies, it’s crucial to comprehend the pivotal role that garage door springs play in the overall functionality of the door. These springs act as the counterbalance, supporting the weight of the door and facilitating smooth opening and closing. Recognizing their significance laid the groundwork for implementing effective measures to extend their lifespan.

Chapter 2: Regular Inspection as a Ritual

The first step in ensuring the longevity of garage door springs is to make regular inspections a ritual. I committed to a monthly visual inspection, scrutinizing the springs for signs of wear, rust, or deformation. Identifying issues at an early stage allows for prompt intervention, preventing potential damage that could shorten the lifespan of the springs.

Chapter 3: Lubrication: A Lifesaver for Springs

One of the most impactful maintenance practices I adopted was regular lubrication of the garage door springs. Using a high-quality silicone or lithium-based lubricant, I applied a thin coat to the springs, hinges, and other moving parts. This lubrication not only reduces friction but also minimizes wear and tear, significantly contributing to the longevity of the springs.

Chapter 4: Mindful Use of the Garage Door

Conscious and mindful use of the garage door emerged as a crucial factor in preserving the springs. I made it a habit to avoid unnecessary and excessive opening and closing of the door. Additionally, I ensured that the door was fully open or fully closed before releasing the opener, reducing the strain on the springs and promoting a smoother operation.

Chapter 5: Balancing the Load

Maintaining a balanced load on the garage door springs is paramount for their longevity. I paid attention to the weight distribution of the door and made necessary adjustments if one side seemed heavier than the other. An imbalanced load can lead to uneven wear on the springs, potentially shortening their lifespan. Regular checks and adjustments became a routine part of my garage door care.

Chapter 6: Weatherproofing for Protection

Garage door springs are susceptible to the effects of weather, especially moisture and rust. To combat these elements, I invested in weatherproofing measures. Applying a rust-resistant coating to the springs and ensuring that the garage is adequately ventilated helped mitigate the impact of adverse weather conditions, enhancing the durability of the springs.

Chapter 7: Professional Maintenance Checks

While homeowner maintenance is crucial, periodic professional checks by a qualified technician are equally important. I scheduled an annual or bi-annual maintenance service to have a trained eye assess the springs, identify any underlying issues, and perform adjustments or replacements as needed. Professional maintenance not only ensures thorough care but also provides peace of mind regarding the condition of the garage door springs.

Chapter 8: Temperature Considerations

Extreme temperatures can exert stress on garage door springs. I took into account temperature considerations, especially during seasons with significant temperature fluctuations. In colder weather, I ensured that the lubricant remained effective, preventing stiffness in the springs. In hotter weather, I paid attention to potential expansion and contraction, making adjustments as needed to maintain optimal performance.

Chapter 9: Upgrading to High-Cycle Springs

As a proactive measure, I explored the option of upgrading to high-cycle springs. Traditional garage door springs have a finite lifespan, typically measured in cycles (one full opening and closing). High-cycle springs, designed for increased durability, became a strategic choice for extending the overall lifespan of the garage door springs. This upgrade proved to be an investment in long-term reliability.

Chapter 10: Education and Awareness

Arming myself with knowledge about the type of springs installed in my garage door and their specific maintenance requirements was a game-changer. I researched the differences between torsion and extension springs, understanding their unique characteristics and care needs. This knowledge empowered me to implement targeted maintenance practices tailored to the specific type of springs in my garage door.

Chapter 11: Safety First in Spring Maintenance

It’s crucial to underscore the importance of safety when dealing with garage door springs. Torsion springs, in particular, can be under high tension and pose a risk of injury if mishandled. I adhered to safety guidelines, refraining from DIY adjustments on the springs and leaving complex maintenance tasks to professionals. Prioritizing safety ensured that my efforts to extend the lifespan of the springs were conducted responsibly.

Conclusion: A Springs-forward Approach to Longevity

In conclusion, based from Garage Door Repair, the journey to extend the lifespan of my garage door springs was marked by a proactive and springs-forward approach. Regular inspections, mindful use, lubrication, load balancing, weatherproofing, professional maintenance, temperature considerations, upgrading to high-cycle springs, education, and a commitment to safety collectively contributed to the longevity of this critical component. As I witness the sustained performance of my garage door springs, I am reminded that a thoughtful and consistent approach to maintenance can indeed spring forth long-lasting benefits for homeowners.

Dedham Garage & Overhead Doors

3 Allied Dr #303, Dedham, MA 02026, United States

781-650-7642

Best Garage Door Materials for Durability – Riverside Garage & Overhead Doors

In my quest for the ideal garage door, durability emerged as a paramount factor. This article chronicles my journey into the world of garage door materials, navigating through the myriad options to uncover the ones that stand the test of time.

Join me as we explore the best garage door materials for durability, blending strength, resilience, and lasting appeal by following Garage Door Repair.

Chapter 1: The Foundation of Durability

Understanding the foundation of durability began with a closer look at the materials commonly used for garage doors. Steel, aluminum, fiberglass, and wood are among the contenders, each bringing its unique set of qualities to the forefront.

Chapter 2: Steel – The Stalwart of Strength

As I delved into the realm of durability, steel emerged as the stalwart of strength among garage door materials. Steel doors are renowned for their robustness, providing a solid and secure barrier. Their resistance to impact, denting, and warping makes them an ideal choice for homeowners seeking a garage door that can withstand the rigors of daily use.

Chapter 3: Corrosion-Resistant Aluminum

While not as heavy-duty as steel, aluminum offers its own brand of durability. Its innate resistance to corrosion makes it an excellent choice for homes in coastal or humid environments. Aluminum garage doors are known for their longevity, requiring minimal maintenance to keep them looking pristine over the years.

Chapter 4: Fiberglass – A Lightweight Champion

Fiberglass, often overlooked, emerged as a lightweight champion in the pursuit of durable garage doors. Its resistance to dents, rust, and corrosion, combined with its ability to mimic the appearance of wood, positions fiberglass as an attractive option for those seeking durability without compromising on aesthetics.

Chapter 5: The Timeless Resilience of Wood

Wood, a timeless choice, adds a touch of elegance to durability. While it requires more maintenance than other materials, the natural strength of wood makes it a durable option when properly cared for. The charm of wood lies in its ability to age gracefully, developing a patina that tells the story of years gone by.

Chapter 6: Composite Materials – A Blend of Strength and Style

The evolution of garage door materials led me to explore composite options. Combining the best features of various materials, composite garage doors offer a blend of strength, durability, and aesthetic appeal. These doors often mimic the look of wood while providing the resilience of synthetic materials.

Chapter 7: The Impact of Climate on Durability

Understanding that durability is often influenced by climate, I considered how each material fared in different weather conditions. Steel and aluminum, for instance, excel in resisting the effects of harsh weather, making them ideal for regions with extreme climates. Wood, while durable, may require additional maintenance in areas with high humidity or frequent temperature fluctuations.

Chapter 8: The Role of Insulation in Longevity

Durability goes hand in hand with energy efficiency, prompting me to consider the insulation properties of each material. Steel and aluminum doors can be insulated, providing not only strength but also temperature regulation within the garage. This consideration is particularly crucial for homeowners who utilize the garage as a living space or workshop.

Chapter 9: Personalizing Durability with Design

While strength and resilience are key, the design element should not be overlooked. Durability can coexist with aesthetic appeal, and each material allows for varying design options. Whether it’s the sleek modernity of aluminum, the classic charm of wood, or the versatility of composite materials, personalizing durability to align with the overall aesthetic of the home became a crucial consideration.

Chapter 10: Budgetary Considerations

Balancing durability with budgetary constraints played a role in my decision-making process. While certain materials, like steel and aluminum, offer durability at a relatively lower cost, others, such as wood and high-quality composites, may come with a higher upfront investment. Assessing the long-term value and return on investment became integral to making an informed decision.

Chapter 11: Maintenance as a Pillar of Durability

No discussion of durability is complete without addressing maintenance. Each material has its own maintenance requirements, ranging from the periodic painting of steel doors to the sealing and staining of wood. Choosing a material aligned with my willingness and ability to maintain it over the years became a critical factor in ensuring lasting durability.

Conclusion: Crafting a Durable Legacy

According to Garage Door Repair, as I stand before my chosen garage door, a testament to strength and resilience, I am reminded that the pursuit of durability is a personal journey. The best garage door material for durability is not a one-size-fits-all answer but a carefully crafted decision that considers climate, design preferences, budget, and maintenance capabilities. In the end, the durability of my garage door is not just a practical consideration but a statement of resilience, a crafted legacy that will withstand the tests of time with unwavering strength and enduring charm.

Riverside Garage & Overhead Doors

3410 Torrey St, Riverside, CA 92503, United States

951-494-6436

Best Smart Garage Door Openers – Ontario Garage & Overhead Doors

In a world where technology seamlessly intertwines with our daily lives, the quest for convenience and connectivity extends to even the most mundane aspects of homeownership. As I embarked on the journey to enhance my garage’s functionality, the realm of smart garage door openers beckoned.

By following Garage Door Repair, this article encapsulates my personal exploration of the TOP best smart garage door openers, unraveling the features, benefits, and considerations that guided my decision-making process.

The Prelude: Embracing the Smart Home Era

The realization that my aging garage door opener was due for an upgrade coincided with the growing wave of smart home innovations. The prospect of seamlessly integrating my garage door into the realm of smart technology spurred my curiosity. As I delved into the vast landscape of smart garage door openers, a few brands emerged as the crème de la crème, promising not just convenience but a glimpse into the future of home automation.

Chapter 1: Chamberlain MyQ Smart Garage Hub – The Pioneer

My journey commenced with the Chamberlain MyQ Smart Garage Hub, hailed as one of the pioneers in the realm of smart garage door openers. The allure of this device lies in its simplicity and compatibility. By attaching the hub to my existing garage door opener, I was instantly catapulted into the world of smart control.

Key Features:

  • MyQ Technology: The hallmark feature, MyQ technology, enabled remote control and monitoring of my garage door through a smartphone app.
  • Integration Capabilities: Seamless integration with popular smart home platforms such as Amazon Alexa and Google Assistant, allowing for voice commands and automation.

Chapter 2: Nexx Garage NXG-100 – The Versatile Contender

The Nexx Garage NXG-100 emerged as a versatile contender, capturing my attention with its wide range of compatibility and advanced features. This smart garage door controller promised not just remote access but a comprehensive suite of functionalities.

Key Features:

  • Multi-Device Control: The ability to control multiple garage doors with a single Nexx Garage unit, catering to homes with more than one garage.
  • Smart Notifications: Real-time alerts and notifications, keeping me informed about the status of my garage door and any unusual activities.

Chapter 3: Genie Aladdin Connect – The Intuitive Innovator

Genie Aladdin Connect stood out as an intuitive innovator, offering a user-friendly experience coupled with robust security features. As a homeowner seeking a seamless transition into the smart home era, the Aladdin Connect system resonated with my desire for simplicity and efficiency.

Key Features:

  • Time-Based Rules: The ability to set specific rules and schedules for my garage door, allowing for automation based on my daily routines.
  • Integrated Camera Compatibility: Integration with select security cameras, providing visual confirmation of the garage door’s status.

Chapter 4: Garadget – The Compact Marvel

The Garadget smart garage door controller, with its compact design and futuristic approach, emerged as a marvel in the world of smart home technology. The compact device promised not just remote control but a glimpse into the potential of artificial intelligence.

Key Features:

  • Open-Source Platform: An open-source platform, inviting customization and integration with a wide array of smart home systems.
  • Laser-Based Sensor: A unique laser-based sensor system that measured the position of the garage door, ensuring precise control and security.

Chapter 5: Tailwind iQ3 – The Thoughtful Guardian

Tailwind iQ3 positioned itself as the thoughtful guardian of the smart garage, offering a blend of user-centric features and robust security measures. This smart garage door opener catered to my desire for a holistic and personalized experience.

Key Features:

  • Geofencing Technology: The incorporation of geofencing technology, enabling automatic opening and closing based on my proximity to the garage.
  • Guest Access: The ability to provide temporary access to guests or service providers, enhancing convenience without compromising security.

Comparative Analysis: Weighing the Pros and Cons

1. Compatibility:

While Chamberlain MyQ and Nexx Garage boasted broad compatibility with various garage door openers, Genie Aladdin Connect and Garadget leaned towards specific brands. Tailwind iQ3, with its focus on inclusivity, supported a wide range of garage door types.

2. Integration with Smart Home Platforms:

Chamberlain MyQ and Nexx Garage showcased seamless integration with popular platforms, making them ideal for users already immersed in the smart home ecosystem. Genie Aladdin Connect and Tailwind iQ3 also offered integration but with certain limitations.

3. Advanced Features:

Garadget stood out with its laser-based sensor system, offering precise control. Tailwind iQ3, with geofencing technology, and Genie Aladdin Connect, with time-based rules, introduced advanced features that catered to specific user preferences.

4. User-Friendly Interface:

Nexx Garage and Chamberlain MyQ were lauded for their user-friendly interfaces, making them accessible to users of varying technical expertise. Garadget, with its open-source platform, required a more hands-on approach. Genie Aladdin Connect and Tailwind iQ3 struck a balance, offering advanced features without compromising usability.

My Decision-Making Process: A Harmonious Symphony

As I navigated through the features and considerations of the TOP best smart garage door openers, my decision-making process resembled a harmonious symphony. Each device played a unique role, offering a melody of convenience, security, and innovation. Ultimately, the choice depended on my individual needs, preferences, and the existing ecosystem of my smart home.

In the end, Tailwind iQ3 emerged as the crescendo of my symphony, blending compatibility, advanced features, and a user-friendly interface. The thoughtful integration of geofencing technology and the ability to provide temporary access aligned perfectly with my vision of a smart garage seamlessly woven into the fabric of my daily life.

Conclusion: A Smart Home Overture

According to Garage Door Repair, the exploration of the TOP best smart garage door openers not only upgraded the functionality of my garage but also served as an overture to the broader symphony of my smart home. As I witness the seamless integration, convenience, and security that these devices bring, I am reminded that the future of home automation lies not just in individual devices but in the orchestration of a harmonious and connected living experience.

Ontario Garage & Overhead Doors

1353 E 7th St, Ontario, CA 91764, United States

909-442-4206

Signs it’s Time to Replace Your Garage Door – Denzel Garage Door Repair

As a homeowner who has weathered the seasons with the trusty garage door as the unsung hero of my property, I’ve come to appreciate the importance of recognizing the signs that indicate when it’s time for a replacement. The garage door, often overlooked in its daily service, plays a pivotal role in the safety, security, and curb appeal of our homes.

I’ll share my personal journey of discovering the subtle and not-so-subtle signs that signaled the need for a garage door replacement based from Garage Door Repair.

The Silent Workhorse: Understanding the Role of a Garage Door

Before delving into the signs that herald a need for replacement, it’s essential to understand the multifaceted role a garage door plays in our homes:

1. Security Shield:

A reliable garage door acts as a security shield, safeguarding our vehicles, tools, and belongings from external threats.

2. Curb Appeal Contributor:

The garage door is a significant contributor to a home’s curb appeal. Its design and condition influence the overall aesthetic appeal of the property.

3. Operational Backbone:

Beyond aesthetics, the garage door serves as an operational backbone, facilitating smooth and secure entry and exit.

4. Weather Barrier:

It acts as a barrier against the elements, protecting our vehicles and possessions from harsh weather conditions.

Signs That It’s Time for a Garage Door Replacement:

1. Persistent Operational Issues:

If your garage door has become increasingly finicky, exhibiting issues such as erratic movements, loud noises, or frequent breakdowns, it may be a sign that its operational life is coming to an end. While repairs can address some problems, a pattern of persistent issues could indicate a need for a more comprehensive solution—a replacement.

2. Visible Signs of Wear and Tear:

Inspect your garage door regularly for visible signs of wear and tear. Cracks, warping, or rusting are indicators that the structural integrity of the door may be compromised. These issues not only affect the door’s appearance but also its functionality.

3. Outdated Design and Style:

As design trends evolve, an outdated garage door can detract from the overall aesthetic of your home. If your door lacks the contemporary appeal you desire or if it clashes with the architectural style of your property, it might be time for an upgrade to enhance curb appeal.

4. Energy Inefficiency:

Garage doors with poor insulation can contribute to energy inefficiency. If your garage feels excessively hot or cold despite efforts to regulate the temperature, it may be worth considering a replacement with a more energy-efficient model.

5. Increased Maintenance Costs:

Frequent and costly repairs can add up over time. If you find yourself investing in repairs more frequently than before, it may be financially prudent to consider the long-term benefits of a new, reliable garage door.

6. Lack of Safety Features:

Modern garage doors come equipped with advanced safety features, such as automatic reversal mechanisms that prevent accidents. If your current door lacks these safety features, it’s worth exploring newer models that prioritize the well-being of your family and belongings.

7. Noisy Operation:

Excessive noise during the operation of your garage door can be a sign of worn-out components. While lubrication and minor adjustments may address the issue temporarily, a consistently noisy door might benefit from a replacement for a quieter and more efficient model.

8. Sagging or Imbalance:

A garage door that sags on one side or displays an uneven appearance during operation indicates a structural issue. This imbalance not only affects the door’s visual appeal but also compromises its functionality. In such cases, a replacement becomes a viable solution.

Navigating the Replacement Process: A Personal Perspective

1. Identifying the Need:

My journey toward garage door replacement began with a keen observation of its behavior. From persistent issues to visible signs of wear, recognizing the need for a replacement required a holistic assessment of the door’s condition and performance.

2. Setting Priorities:

Prioritizing my requirements played a crucial role in selecting the right replacement. Whether it was enhanced security features, improved insulation, or a design upgrade, understanding my priorities guided the decision-making process.

3. Exploring Modern Features:

The advancements in garage door technology offered an array of features that weren’t present in my outdated model. Exploring options with smart technology, energy efficiency, and enhanced safety features added value to the replacement journey.

4. Seeking Professional Advice:

Consulting with garage door professionals provided valuable insights into the best options for my specific needs. Their expertise in assessing the condition of my existing door and recommending suitable replacements ensured a well-informed decision.

5. Choosing the Right Style:

Considering the impact of the garage door on curb appeal, selecting a style that complemented the architecture of my home became a pivotal decision. Modern designs offered a refreshing update that harmonized with the overall aesthetic.

6. Installation by Experts:

Entrusting the installation to experienced professionals guaranteed a seamless transition. Their precision and expertise ensured that the replacement door was not only visually appealing but also operated smoothly and efficiently.

The Transformative Impact of a New Garage Door:

1. Enhanced Curb Appeal:

The immediate impact of the replacement was a noticeable enhancement in curb appeal. The modern design and fresh appearance of the new door contributed to an updated and inviting exterior.

2. Improved Security and Safety:

The incorporation of advanced security features and safety mechanisms provided peace of mind. Knowing that my garage door prioritized the well-being of my family and possessions added an extra layer of security.

3. Efficient Energy Management:

The improved insulation of the new garage door contributed to more efficient temperature management. The garage space became more comfortable, and energy costs were noticeably reduced.

4. Reduced Maintenance:

With a new, reliable door in place, the need for frequent repairs and maintenance diminished significantly. This not only saved time and effort but also contributed to long-term cost savings.

5. Seamless Operation:

The quiet and smooth operation of the new garage door became a testament to its quality. The transformative impact on daily convenience reinforced the decision to invest in a replacement.

Conclusion: A Personal Journey Towards Renewal

Embarking on the journey of recognizing and addressing the signs that signaled the need for a garage door replacement was a transformative experience. From the initial realization of wear and tear to the eventual installation of a modern and efficient replacement, every step contributed to the renewal of an essential element of my home.

As a homeowner and as stated in Garage Door Repair, understanding the signs that indicate the need for a garage door replacement empowers you to make informed decisions that enhance the overall functionality, security, and curb appeal of your property. The investment in a new garage door isn’t just a practical decision; it’s a commitment to the continued well-being and aesthetic harmony of your home.

Denzel Garage Door Repair

2380 Camino Vida Roble, Carlsbad, CA 92011, United States

760-970-8179

Garage Door Keypad Programming – Denzel Garage Door of Long Beach

As a homeowner seeking convenience and enhanced security, delving into the realm of garage door keypad programming became a pivotal chapter in my journey. The ability to open and close the garage door with a personalized code not only streamlined access but also added an extra layer of protection to my home.

By following Garage Door Repair, I share my personal experiences, insights, and a step-by-step guide to mastering garage door keypad programming.

Understanding the Basics of Garage Door Keypad Systems:

Before embarking on the programming journey, I familiarized myself with the fundamental components of a garage door keypad system.

**1. Keypad Unit:

The keypad unit is typically mounted outside the garage, adjacent to the entry door. It features a set of numbered buttons, usually from 0 to 9, and additional function buttons such as “Enter” and “Learn.”

**2. Control Box:

The control box is located inside the garage and is connected to the garage door opener motor. It serves as the brain of the keypad system, interpreting the entered code and triggering the door’s opening or closing.

**3. Personal Identification Number (PIN):

Each user is assigned a unique PIN, a sequence of numbers entered on the keypad to activate the garage door. The PIN serves as a digital key, providing secure access.

Step-by-Step Guide to Garage Door Keypad Programming:

Step 1: Locate the “Learn” Button on the Garage Door Opener:

The first step involves locating the “Learn” button on the garage door opener motor. This button is crucial for syncing the keypad with the opener. It is typically located on the back or side of the motor unit and may be labeled as “Learn” or “Program.”

Step 2: Clear Existing Codes (Optional):

If there are existing codes programmed into the garage door opener, it’s advisable to clear them before adding a new one. This step ensures a fresh start for the programming process. Press and hold the “Learn” button until the indicator light blinks or changes color, indicating that the existing codes have been cleared.

Step 3: Choose a PIN:

Select a PIN that is easy for you to remember but not easily guessable by others. Avoid using obvious sequences like “1234” or repetitive numbers. The security of the keypad system relies on the strength of the chosen PIN.

Step 4: Access the Keypad Programming Mode:

Most garage door keypads have a specific programming mode that needs to be accessed. This is usually done by entering a predefined sequence of numbers or pressing a specific button combination. Refer to the keypad’s user manual for instructions on entering programming mode.

Step 5: Enter the PIN:

Once in programming mode, enter the chosen PIN on the keypad. This is the code you will use to operate the garage door. Press the “Enter” or equivalent button after entering the PIN.

Step 6: Sync with the Garage Door Opener:

After entering the PIN, head back to the garage door opener motor and locate the “Learn” button. Press the “Learn” button, and you should see an indicator light or hear a beep, signaling that the opener is ready to learn the new code.

Step 7: Transmit the Code from the Keypad:

Return to the keypad and press the “Enter” or equivalent button again. This action transmits the chosen PIN to the garage door opener. The opener will recognize and memorize the code, associating it with the keypad.

Step 8: Test the Keypad:

With the programming complete, it’s time to test the keypad. Stand outside the garage, enter the programmed PIN, and press “Enter.” The garage door should respond by opening or closing. This step ensures that the keypad and opener are in sync.

Step 9: Add Additional Users (Optional):

If multiple users need access, the keypad system allows for the programming of additional PINs. Repeat the steps for each user, ensuring that each person has a unique and secure code.

Tips for Successful Garage Door Keypad Programming:

**1. Keep the User Manual Handy:

The user manual that comes with the garage door keypad is a valuable resource. It provides specific instructions for programming, troubleshooting, and additional features. Keep it accessible for reference during the programming process.

**2. Change the Default PIN:

For enhanced security, change the default PIN provided by the manufacturer. Using a unique and personalized code reduces the risk of unauthorized access.

**3. Regularly Update PINs:

Consider updating PINs periodically, especially if there are changes in household members or if access needs evolve. Regularly refreshing codes enhances security.

**4. Test the Battery:

If the keypad operates on batteries, periodically check and replace them as needed. A malfunctioning keypad due to weak batteries can lead to access issues.

**5. Secure Keypad Placement:

Mount the keypad in a location that is easily accessible to authorized users but not blatantly visible to passersby. This balance ensures convenience without compromising security.

My Personal Experience with Garage Door Keypad Programming:

When I first decided to install a garage door keypad, the process seemed daunting. However, armed with the user manual and a determination to enhance home security, I navigated through the steps. Here are a few insights from my personal experience:

**1. Convenience Redefined:

The convenience of entering a personalized code to open the garage door quickly became a game-changer. No longer did I need to fumble for keys or worry about forgetting them. The keypad provided seamless access.

**2. Enhanced Security Peace of Mind:

Knowing that only individuals with the correct PIN could access my garage brought a sense of enhanced security. It acted as a personalized key, reducing the risk of unauthorized entry.

**3. Multiple User Flexibility:

As my household expanded, the ability to program multiple PINs proved invaluable. Each family member had their unique code, allowing for individualized access.

**4. Periodic PIN Updates:

I adopted the practice of updating PINs periodically. This not only served as a security measure but also allowed for adjustments based on changing circumstances or guest access requirements.

**5. User-Friendly Operation:

Contrary to initial apprehensions, the garage door keypad proved to be remarkably user-friendly. Once programmed, its operation became second nature, contributing to the overall convenience of daily life.

Conclusion: Empowering Home Security with Keypad Mastery:

Garage door keypad programming is not just a technical feat; it’s a personalized approach to enhancing the security and convenience of home access. Through a systematic process and adherence to best practices, I transformed my garage door into a fortress accessible only to those with the right digital key.

According to Garage Door Repair, whether you’re a seasoned DIY enthusiast or a first-time homeowner, mastering garage door keypad programming is an empowering journey. It’s a testament to the evolving landscape of home security, where convenience meets robust protection at the threshold of your garage.

Denzel Garage Door of Long Beach

1635 Cedar Ave, Long Beach, CA 90813, United States

562-337-3432

Page 2 of 39

Powered by WordPress & Theme by Anders Norén